Those chakram/wind&fire wheel things are a LOT more tedious than I expected. I originally wanted to just wrap pieces of craft foam around hoola hoops, but then I decided I wanted them to look heavier and chunkier, if that makes sense. They're also supposed to be quite big, so they need to be convention-safe, as much as I hate screaming kids running around at events and want to take their heads off..... no. 8(
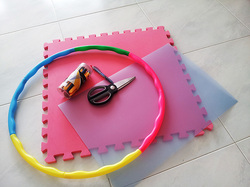
I ended up using foam, still, but instead of normal foam sheets I used heavy eva floor mats leftover from my Sice Scythe. Hoops were from Daiso at $2 apiece. The wonderful thing about these is that can be dismantled and assembled again, for ease of transport. They were a little too large so I removed one section from each of the hoops (hence the lonely green piece on the hoop in the photo LOL). I also used PP sheeting, you'll see why later.
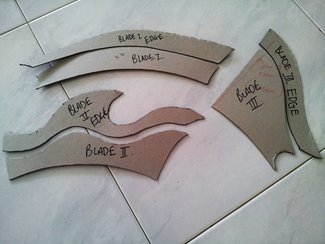
Before doing anything else I drafted the blade portions of the chakrams on cheap cardboard. I separated the main body of each blade from the beveled section.
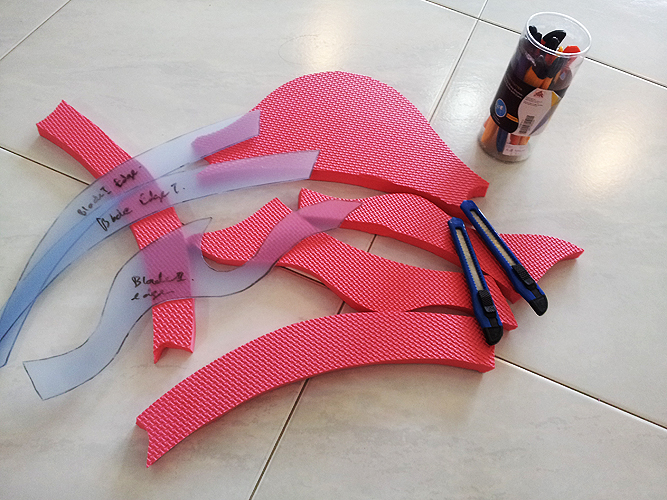
Using the cardboard pieces as a template, I traced the main blade pieces on the foam, and the edge pieces on PP board, and cut them out.
Using the cardboard pieces as a template, I traced the main blade pieces on the foam, and the edge pieces on PP board, and cut them out.
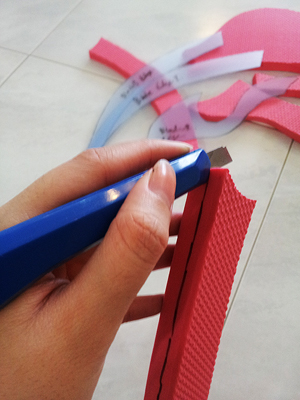
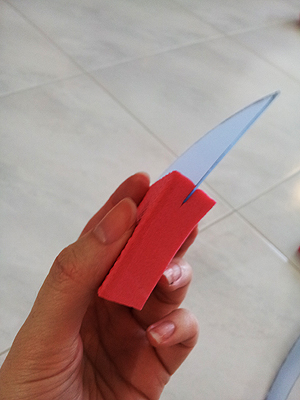
I then scored a line about half an inch deep into each foam piece on the outer edge with a cutter, slid the corresponding PP piece into it, and glued it down.

What this does is create a nice thickness, and the PP sheet in the middle serves as both a guide and a support structure for the beveled edge of the blade. You could achieve a nice edge by carefully cutting the foam at an angle and sanding it down nicely, but I lack the skill and patience to do that properly. Also I'm not bothering about the textured side of the foam at the moment, I'm going to go over each piece with another layer of (thinner) craft foam later.
Traced out another set of 'edge' pieces from the cardboard template and cut them out. I used craft foam again for this because you can stretch and bend it to fit, so there's no need for hair-pulling precision.
Traced out another set of 'edge' pieces from the cardboard template and cut them out. I used craft foam again for this because you can stretch and bend it to fit, so there's no need for hair-pulling precision.
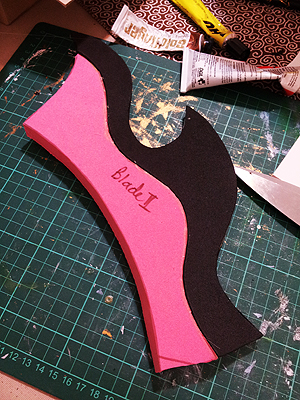
After gluing (very carefully) it onto the rest of the blade like so, I had something that looked like this. I needed to be as neat as possible so I abandoned my hot glue gun in favor of contact glue LOL. The stuff really stinks though, you can smell it even through a mask.
Now, I just had to repeat the process for all 9 other blades (omgwtf dyinggg).
Now, I just had to repeat the process for all 9 other blades (omgwtf dyinggg).
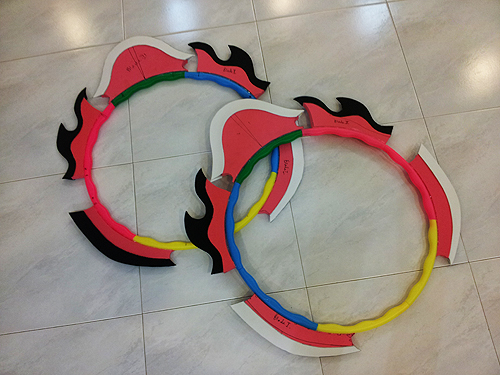
I marked out where each blade was supposed to go, drilled holes into the hoops, inserted lengths of stiff wire, pushed the blades onto them, and glued everything in place, taking care to leave certain joints free for disassembly.
And now, we're done with the basic structure. \o\ They look so funky and psychadelic, oh what joyful hoops of doom. Much refining and detailing to come, so it'll be a few days more before these are completed but I'm reallllly looking forward to finishing everything. I always thought SSX's weapons were so pretty.
Besides the chakrams, I've also been working on the rest of the armor -
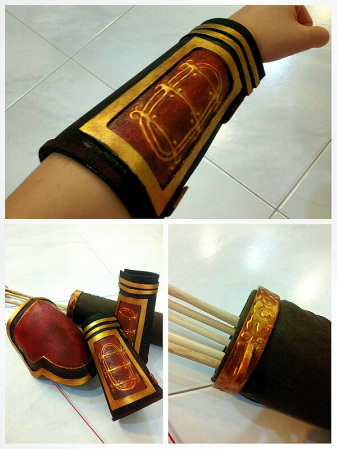
The bracers and pauldron were made from craft foam raided from my stash of leftovers. The quiver was one of those.. plastic cylindrical drawing block/art paper carriers, I have no idea what they're called, someone please enlighten me.
Anyway I had an old one from my school days so I just used that. I cut away the canvas straps that came with it, removed the 'collar', and detailed it with hotglue before spraypainting and drybrushing. Wrapped the quiver in some scrap piece of brown suede I had leftover from my Lightning skirt, and then slipped the collar back on. I'm in the process of digging through my piles of scrap for strips of leather or pvc that I can use for a strap. I swear, I have so much nonsense in the storeroom, discovered many many many piles of junk leftover from previous cosplays after springcleaning. I just chucked them into a great huge box, which actually defeats the purpose of springcleaning, actually...
I still have a bit of color to add to the bracers, there's a thin strip of bright sky blue running along the top, between the two bands of gold. The pauldron also needs a bit of puttying and sanding along the seams, but we're almost done here!
 RSS Feed